

Table of contents


No headings in the article.
Mates, here I am for a new post. For the last few months, I've been learning GCP Cloud to improve my serverless skills. And this practice is something I wanted to share and document for future implementations.
There are 3 basic concepts here you need to know before we can continue.
What are Google Cloud Functions?
Google Cloud Functions is a serverless execution environment for building and connecting cloud services. With Cloud Functions you write simple, single-purpose functions that are attached to events emitted from your cloud infrastructure and services. Your function is triggered when an event being watched is fired. Your code executes in a fully managed environment. There is no need to provision any infrastructure or worry about managing any servers.
What is Google Cloud Build?
Cloud Build is a service that executes your builds on Google Cloud. Cloud Build can import source code from a variety of repositories or cloud storage spaces, execute a build to your specifications, and produce artifacts such as Docker containers or Java archives.
What is Nest.js?
Nest (NestJS) is a framework for building efficient, scalable Node.js server-side applications. It uses progressive JavaScript, is built with and fully supports TypeScript (yet still enables developers to code in pure JavaScript) and combines elements of OOP (Object Oriented Programming), FP (Functional Programming), and FRP (Functional Reactive Programming). Under the hood, Nest makes use of robust HTTP Server frameworks like Express (the default) and optionally can be configured to use Fastify as well!
Now you know the tech we are going to use, make sure to create an account on GCP so you can follow this practice and deploy the service.
Step #1: Generate a new nest project and make the appropriate changes so it can be run by a GCP Cloud Function.
1.1 Go to nest.js official page and generate a new project following the first steps doc: https://docs.nestjs.com/first-steps
1.2 Modify the src/main.ts like this:
import * as express from "express";
import {AppModule} from './app.module';

const server = express()
import {http} from '@google-cloud/functions-framework'
import {ExpressAdapter} from "@nestjs/platform-express";
import {NestFactory} from "@nestjs/core";
import {Logger} from "@nestjs/common";

export const createNestServer = async (expressInstance) => {
  const app = await NestFactory.create(AppModule, new ExpressAdapter(expressInstance))
  app.enableCors()
  return app.init()
}
createNestServer(server)
  .then((v) => {
    if (process.env.environment === "development") {
      Logger.log(`🚀 Starting development server on http://localhost:${process.env.PORT || 3333}`)
      v.listen(process.env.PORT || 3333)
    } else {
      Logger.log('🚀 Starting production server...')
    }
  })
  .catch((err) => Logger.error('Nest broken', err))
http('apiNEST', server) // <- entry point definition
1.3 Modify package.json to add main entry point:
"main": "dist/main.js"
1.4 Install the Google Cloud functions Client library
npm install -s @google-cloud/functions-framework
Step #2: Generate a trigger in Cloud Build
A trigger is a mechanism in which we specify the action that will create or update a cloud function using a source (you can use GCP source repositories, Github, Bitbucket, etc.) as the source of the code. Then based on a file called cloudbuild.yaml which is the recipe of the container given we will use cloud functions of 2nd generation (unlike 1st gen these are based on containers) we will spin the cloud function up. This is a lot of information, feel free to read the official docs to understand more about serverless in GCP and cloud functions in general.
2.1 Go to Cloud Build section, then move to the Triggers page from the sidebar. Here you will see the "Create Trigger" button.
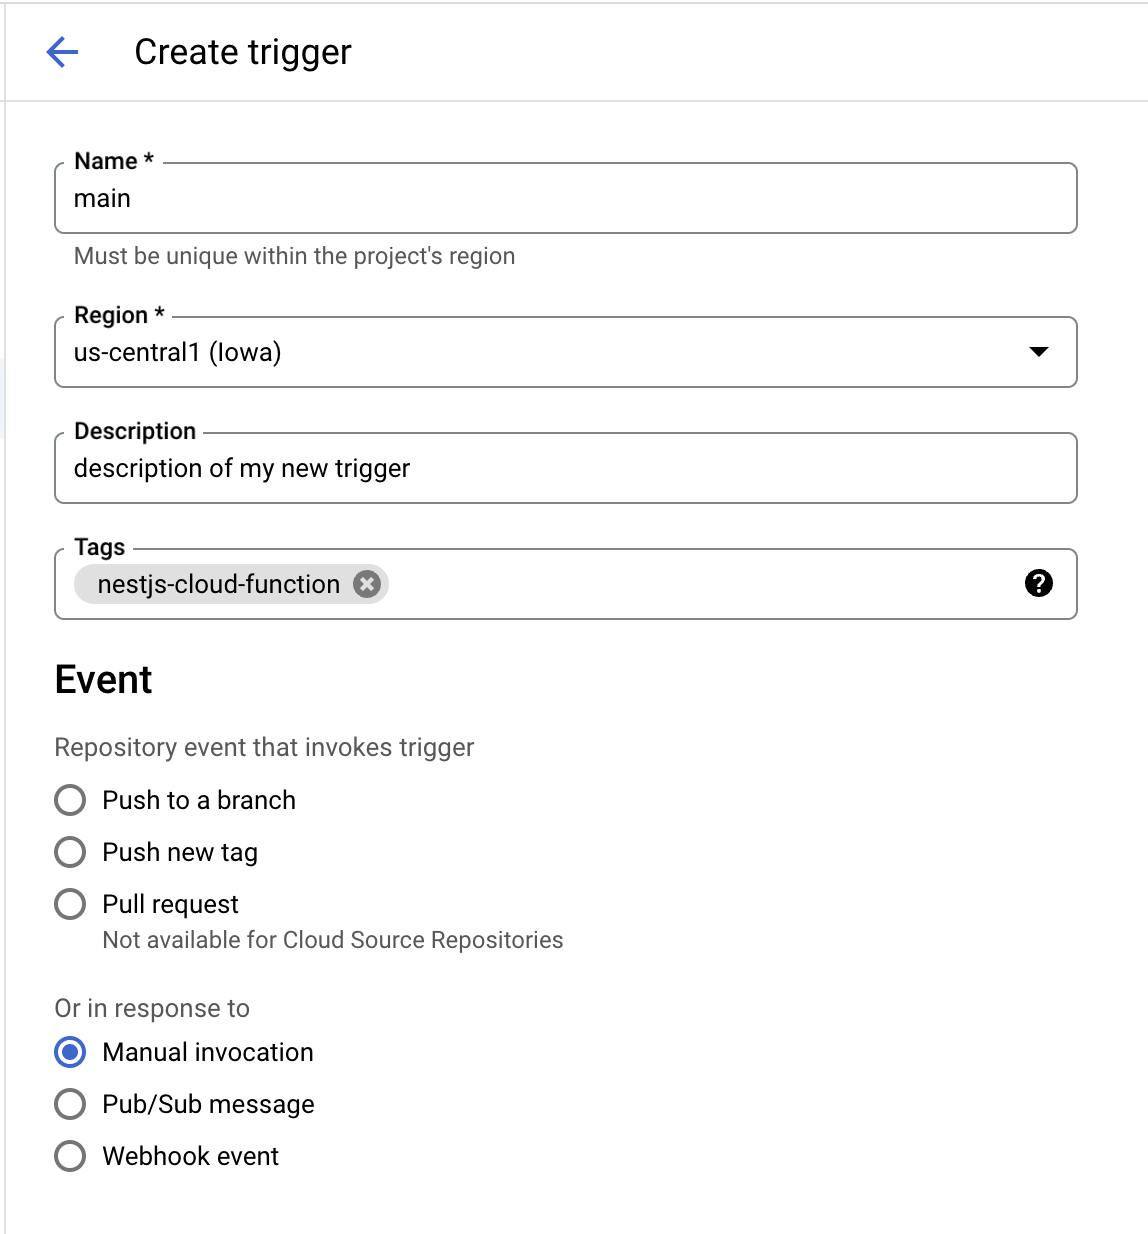
2.2 We will start with the basic information of the trigger as shown in the following image:
You are required to define the trigger name and region. For the Event section, let's pick Manual invocation for the sake of the practice.
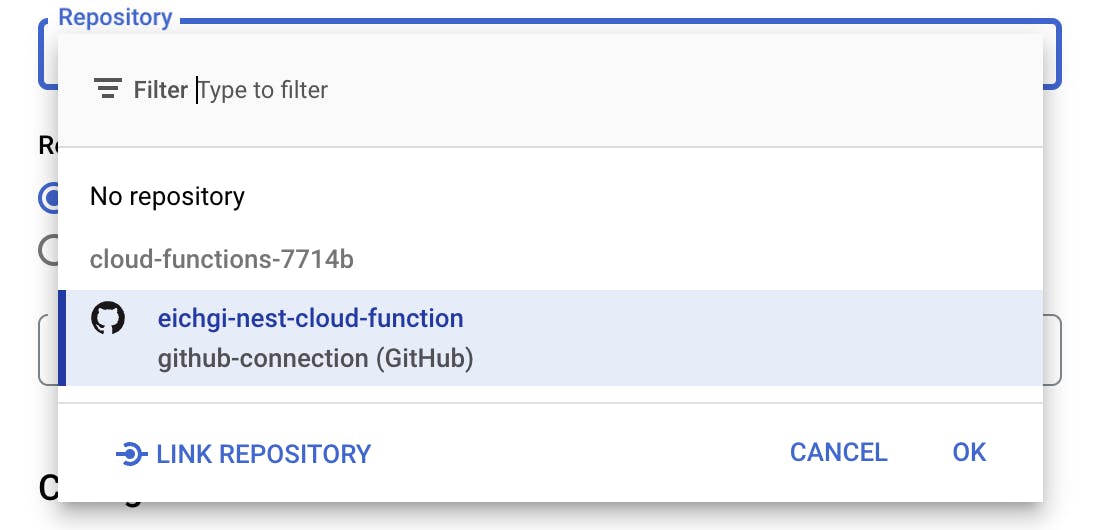
2.3 Define the code source
Here you will be requested to connect a source repository, select 2dn gen option then you will need to link your GitHub or Bitbucket account and repository. Follow the image to connect your VCS. Repository > Link repository > Connection > Create Host Connection.

You will be redirected to a new tab so you can create this connection. Set the same region used before for the trigger definition and make sure you enable the Secret Manager API in case is not.

Once enabled, click the Connect button again, and you will be asked to link your GitHub account if the case. Once you finish, you should be able to set a repository from your account from the trigger creation form.
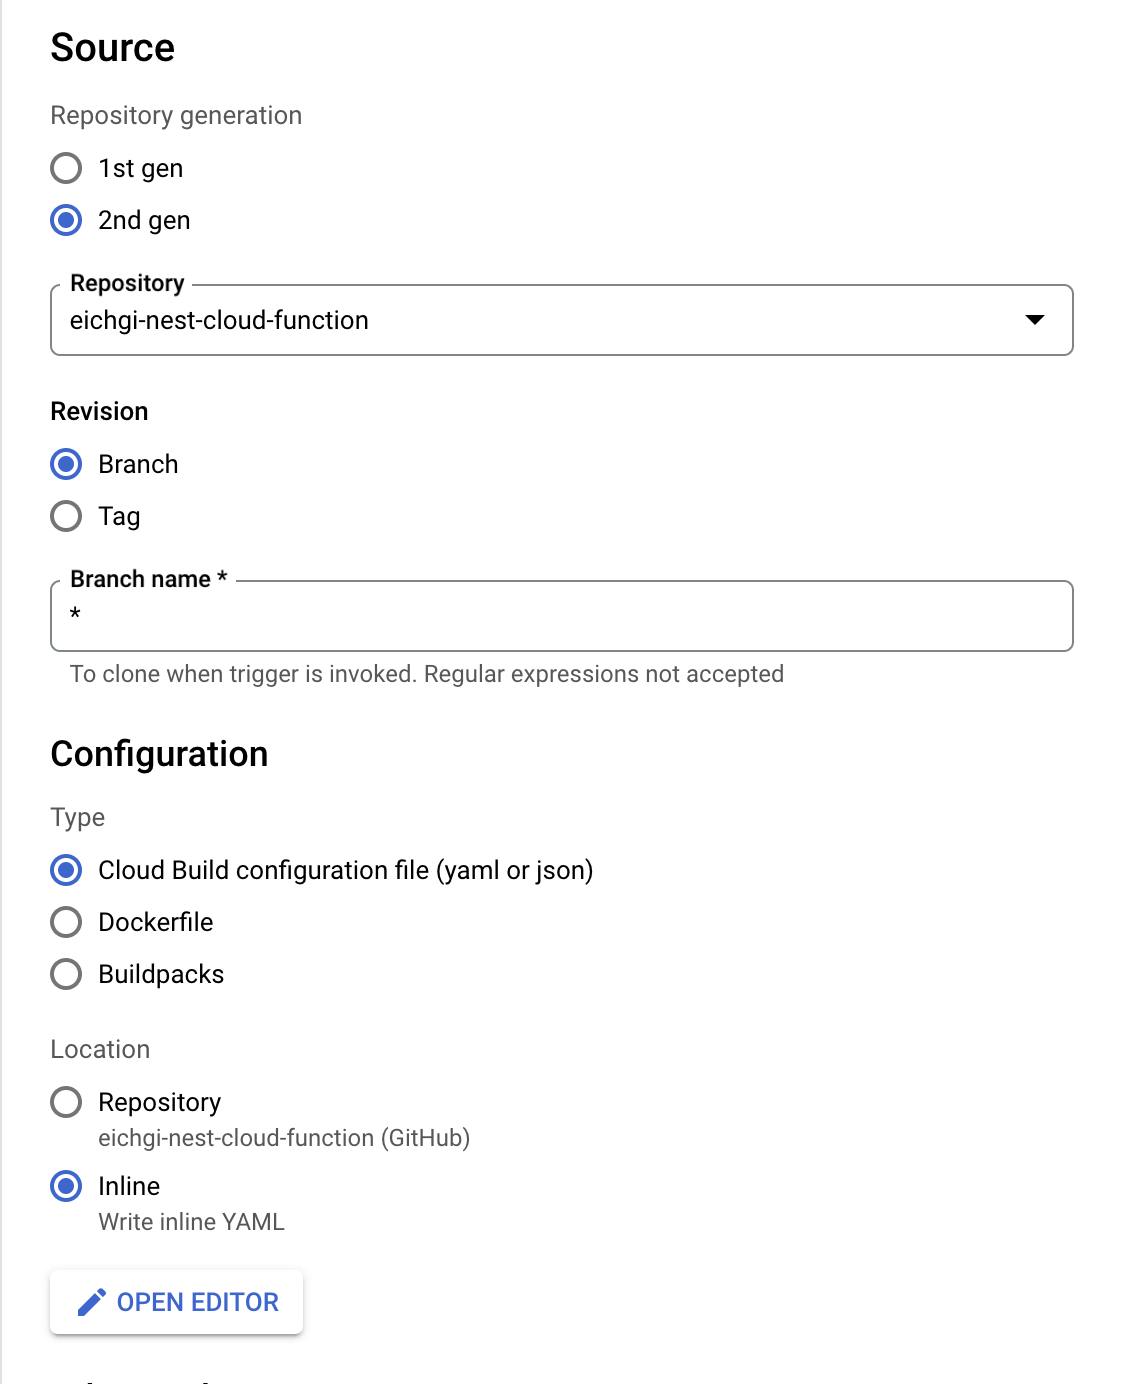
2.4 Configuration
In this section, you should set the type and location. For this practice, we will set Cloud Build configuration file and Inline like the image**:**
2.5 Open the editor and save the following code snippet which is the cloudbuild.yaml (it can be stored inside the repository as well, if that is the case set Location > Repository).
steps:
  - name: 'gcr.io/google.com/cloudsdktool/cloud-sdk:alpine'
    args:
      - gcloud
      - functions
      - deploy
      - main
      - '--region=us-central1'
      - '--source=.'
      - '--trigger-http' #the function can be accesed with the browser
      - '--runtime=nodejs18'
      - '--entry-point=apiNEST' #main function at src/main.ts
      - '--gen2' #specifying a 2nd gen function
      - '--allow-unauthenticated' #allowing public access
2.6 Leave Advanced section as default with no changes and no service account selected (this is important for the next step).
2.7 Save the changes, the trigger is ready.
Step #3: Enable required permissions for Cloud Build
3.1 In the Cloud Build page go to the Settings page. Once here you must enable the Cloud Functions Developer, Cloud Run Admin and Service Account User permissions, otherwise the deployment will fail.

Enabling the permissions this way doesn't follow the least privilege principle when working with Cloud Build. But for the sake of the practice, we will continue this way.
Step #4: Run the trigger for function generation
4.1 Go to the triggers page and you should see listed the brand new trigger just created.
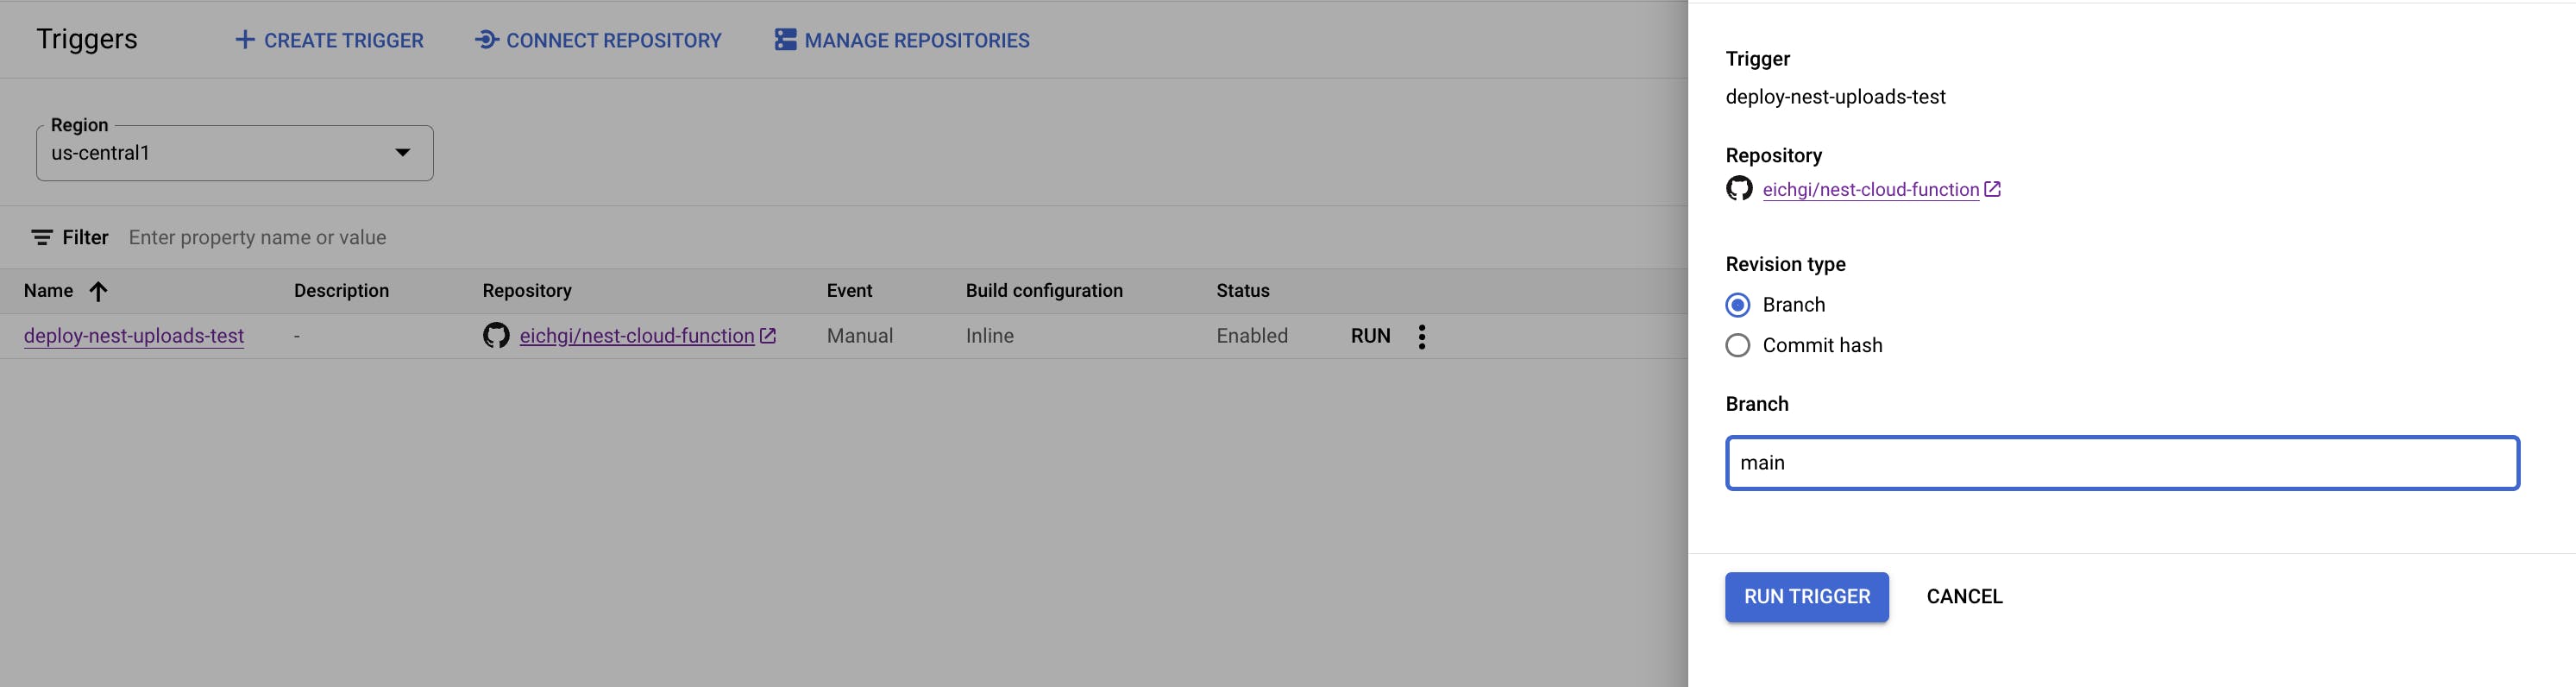
4.2 Click the RUN button and then select the branch, then RUN TRIGGER
4.3 In the History page at Cloud Build you should be able to see 2 records. One is for the cloud build running process, the second one is for the cloud function generation.

4.4 Once everything is finished successfully go to the Cloud Functions page in GCP. Here you should be able to see the created cloud function.

4.5 Click the name of the function so you can see the URL link among other details.

4.5 Click the URL and you should be able to see the Hello World! message and that's it! You just generated a Cloud Function with Nest.js framework and Cloud Build.
I hope you like this introduction to serverless architecture in GCP. There are many other options and configurations available for your CI/CD pipelines. Stay tuned for more content and feel free to leave your comments.